Glamping has a reputation for being pricey, and some of it is. But here’s what most people miss: a well-timed budget glamping trip can cost barely more than a standard campsite stay, especially if you travel off-peak, book smart and skip the expensive extras. The difference between a $250 night and an $80 night often comes down to nothing more than the dates you pick.
This guide walks you through the whole process step by step: what glamping actually costs and what drives the price, how to choose dates and destinations that keep rates low, how to book for the best deal, which stay type fits your budget, and how to cut on-site costs for food and activities. Follow these steps and you’ll get the comfy bed, the wood stove and the starry sky without the premium price tag.
What a Budget Glamping Trip Actually Costs
Most glamping sites charge somewhere between $80 and $250 per night, and that’s a wide enough range that your choices matter a lot. At the lower end you’ll find simple canvas tents and basic yurts, often on small family-run sites or in state parks. At the higher end you get safari tents with private bathrooms, decks, hot tubs and full kitchens. What pushes the price up? Location near famous national parks or coastlines, private bathrooms, heating and cooling, and anything with the word “luxury” in the listing.
The single biggest lever is timing. Off-season rates often drop 30-50%, which means a site that costs $200 on a July Saturday might be closer to $100 on an October Tuesday. That discount doesn’t just trim the nightly rate; it changes the whole shape of your trip budget, freeing up money for good food or an extra night.
Look at the total trip cost, not the nightly rate
A $90 tent with no kitchen can end up costing more than a $130 cabin once you add restaurant meals, firewood bundles and rented gear. When you compare options, add up the site cost for all your nights, your food plan, activities and any add-on fees like linens or cleaning charges. A slightly pricier stay that includes a kitchenette and firewood often wins on total cost, and it makes the whole trip easier to plan.
Choosing the Right Dates: Season and Midweek Savings
Dates matter more than almost anything else when you’re glamping on a budget. The sweet spot is the shoulder season: May-June and September-October. In these months you typically get pleasant daytime temperatures, cooler nights that make a wood stove or campfire genuinely enjoyable, and rates well below peak summer pricing. Sites are also quieter, so you get more space, easier access to shared facilities and a calmer atmosphere overall.
Go midweek and save even more
Stack a second saving on top of shoulder-season pricing by staying Sunday through Thursday. Midweek stays often cost 20-40% less than Friday and Saturday nights, and many sites fill their weekends months in advance while midweek slots sit open. If you can take two days off work and travel Sunday to Thursday, you’ll often pay less for five nights than you would for two weekend nights in July.
The dates to avoid are peak summer weekends, when demand is highest and rates sit at the top of every site’s price range. If a summer trip is unavoidable, shift it to Sunday through Wednesday rather than Friday to Sunday. And whatever season you choose, check the site’s own calendar, since some operators publish midweek or shoulder-season specials directly that never show up on booking platforms.
Picking a Destination Close to Home
The easiest way to keep a glamping trip affordable is to skip the airport entirely. Keep your destination within a 2-3 hour drive of home and you eliminate flights, rental cars, baggage fees and airport food from your budget altogether. A shorter drive also means you can bring more gear for free: a cooler, a camp stove, extra blankets and that big bag of firewood that would cost a fortune at a site shop.
Look past the famous names
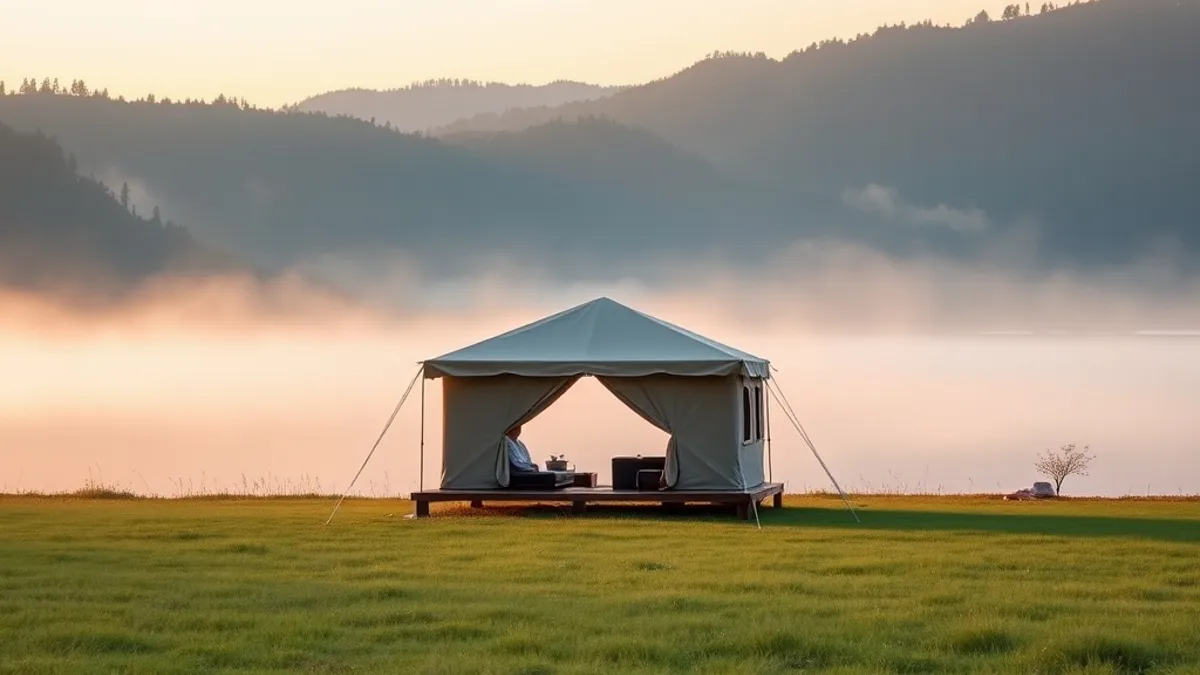
The best budget glamping spots are rarely next to the headline attractions. Regional state parks, countryside farms and small family-run sites typically charge noticeably less than listings near famous national parks or coastal hotspots, even when the scenery is nearly as good. A lakeside yurt two hours from home can deliver the same sunrise, the same trails and the same campfire evenings as a trendy destination, at a fraction of the price. Search for glamping in your own state or the neighboring one and you’ll usually find options you never knew existed.
Finally, match the destination to the season. If you’re traveling in shoulder season, pick a spot where cooler, changeable weather still works: forested areas with good hiking, sites with covered decks or wood stoves, and destinations with indoor options nearby for rainy afternoons. Save the high-altitude tents and beachside canvas for warmer months, and your off-peak dates will feel like a bonus rather than a compromise.
How to Book Your Budget Glamping Trip for the Best Rate
Getting a good rate on a glamping trip is mostly about timing and asking the right questions. Sites rarely advertise their cheapest options loudly, so a little planning before you click “book” can save you a meaningful chunk of your budget. The good news is that the process is simple, and it works whether you are booking a yurt in a state park or a safari tent on a private farm. Follow the steps below in order and you will usually end up paying less than someone who books the first available unit they see.
- Book 2-3 months ahead for standard trips. This window usually gives you the widest choice of units at normal rates. Popular sites fill up slowly at first, then suddenly, so booking in this range means you avoid both the early premium and the last-minute scramble.
- Book 4-6 months ahead for peak summer weekends. Friday and Saturday nights in July and August are the hardest dates to land at a fair price. If a summer weekend is non-negotiable for your group, reserving months in advance is often the difference between a reasonable rate and whatever is left over.
- Ask about multi-night discounts. Many sites offer 10-15% off for stays of 3 nights or more, but you often need to ask directly or book by phone or email. A quick message before booking costs nothing and can shave a night’s worth of cost off a longer stay.
- Compare direct booking with platforms. Booking platforms are convenient for browsing, but they typically add service fees on top of the nightly rate. Once you have found a site you like, check the operator’s own website or call them. Direct rates can skip those fees entirely, and operators sometimes throw in extras for booking directly, such as flexible check-in or a small welcome perk.
One last tip: take a screenshot or note of the total price, including all fees, from each channel before you decide. The cheapest headline rate is not always the cheapest final bill, and comparing the true total takes about five minutes. It also gives you leverage — if a site’s own price is higher than a platform’s, mention it and ask them to match it. Most small operators would rather keep the booking (and avoid paying platform commission) than lose you over a few dollars.
Choosing a Stay Type That Fits Your Budget
Not all glamping is priced the same, and the stay type you pick has the biggest single effect on your nightly rate. The same site can offer everything from a simple furnished tent to a heated cabin with its own bathroom, and the gap between them can be substantial. Matching the accommodation to your actual needs, rather than the prettiest photos, keeps the budget in check.
Tents and yurts sit at the lower end of the scale and are the smartest choice if your main goal is sleeping somewhere comfortable in nature without paying for extras you will not use. Cabins and safari tents cost more, but they add real comfort: heating for chilly shoulder-season nights and private bathrooms, which matter a lot if you are traveling with kids or staying several nights.
- Check whether linens are included. Some sites provide made-up beds as standard, while others charge a linen fee or ask you to bring a sleeping bag and pillow. That fee can be a surprise at checkout, so confirm before booking.
- Ask about kitchen access. A shared camp kitchen or a basic cooking setup lets you self-cater and skip expensive meals. A unit with no cooking facilities at all quietly forces you toward on-site food prices.
- Find out if firewood is provided. Campfires are half the fun of a glamping trip, but wood sold on site is usually priced at a premium. Sites that include a bundle per night save you both money and a trip to the nearest store.
- Look at heating and cooling. A tent in early spring or a canvas unit in midsummer can be uncomfortable without a heater or fan. If these are included, you can travel in cheaper shoulder-season months without suffering.
Write down what each option includes before comparing prices. A cabin at a higher nightly rate with linens, kitchen and firewood included can end up cheaper overall than a bare-bones tent with add-on fees. The cheapest headline rate is not the same thing as the cheapest stay.
Cutting On-Site Costs: Food and Activities
The nightly rate is only part of what a glamping trip costs. Food, activities and forgotten gear are where budgets quietly double, especially at remote sites where the on-site shop and restaurant face no competition. When you have already driven a few hours to reach a quiet spot, there is often nowhere cheaper nearby to buy supplies, so the site sets the price and you pay it. A little preparation before you leave home keeps these costs under control and lets you spend your money on the things you actually care about.
Self-catering is the single biggest saving. Meal packages and on-site dinners are convenient, but they can cost as much as a restaurant meal in a city. Bringing your own supplies and cooking at the site turns food into one of the cheapest parts of the trip instead of one of the most expensive. Before you book, ask the host what cooking facilities exist, whether that is a full shared kitchen, a camp stove or just a fire ring, and plan your meals around whatever you find.
- Plan simple one-pot meals. Pasta, stews, wraps and breakfasts like oatmeal or eggs need minimal equipment and cleanup, and they work even on a basic camp stove or shared kitchen.
- Prep at home. Chop vegetables, mix spice blends and portion snacks into containers before you leave. It saves time at the site and stops you from buying ready-made food out of convenience.
- Build your fun around free activities. Hiking trails, swimming spots and campfire evenings cost nothing or close to it, and they are usually the reason people remember a trip. Check what the surrounding area offers before paying for add-ons.
- Bring a small activity kit. A deck of cards, a frisbee or a book for rainy hours keeps everyone entertained without a trip to the site shop, where small items are typically marked up.
- Pack layers and the basics. Nights get cold even in warm months, so bring warm layers, a headlamp, a reusable water bottle and basic toiletries. Buying these on site, if they are stocked at all, is where overpriced gear really bites.
Do a quick packing check two days before departure and tick items off a short list. Write the list out once and reuse it for every trip, since forgotten items tend to be the same ones every time. The goal is simple: arrive with everything you need, so the only money you spend on site is on things you actually chose to spend it on.
Your Budget Glamping Trip at a Glance
Glamping often gets a bad rap on cost, but that impression usually comes from peak-season weekends at famous hotspots. A well-timed trip tells a different story: book a yurt or tent in shoulder season, stay midweek, and your nightly rate can land in the lower end of the $80-$250 range — sometimes not far above what a standard campsite stay costs once you factor in gear and convenience.
The savings stack up quickly. Travel in May-June or September-October and from Sunday to Thursday, book 2-3 months ahead, and ask about multi-night discounts. Stay within a 2-3 hour drive of home to skip flights, and bring your own food to keep the total trip cost down. If this guide helped you plan your own budget glamping trip, leave a comment or share it with a friend who loves the outdoors.